
Introduction to the present situation
It has been 8 years since this car has been documented as a project story. The 131 Supermirafiori has been my daily driver for the most of that time and has mainly done that job very well - doing around 80 km per workday. Occasionally, my Fiat Croma Turbo has replaced the 131, but whenever I am returning behind the steering wheel of my Supermirafiori, I have always been wondering, is there really any idea to drive any other car than this.
However, the road salt does its job and the fact is that the surface treatment job during my previous overhaul should have been done better. This day, when the car turns 31 years and has had done over 500 000 kms, it is worthwhile to perform a sort of larger maintenance job for the car.
As clearly seen from the pictures below, the condition of the car body is not good any more. During the last two years of the time I was keeping the car as daily driver, I had a limited access to the garage space, and all rust-preventive actions were omitted, too. This is perhaps the main reason for the poor appearance of the car.

Dismantlement
The renovation was started by stripping all doors and powertrain off the car. Also, all upholstery was removed, only leaving the dashboard in place. The fuel tank with all associated pipes and hoses had come off.
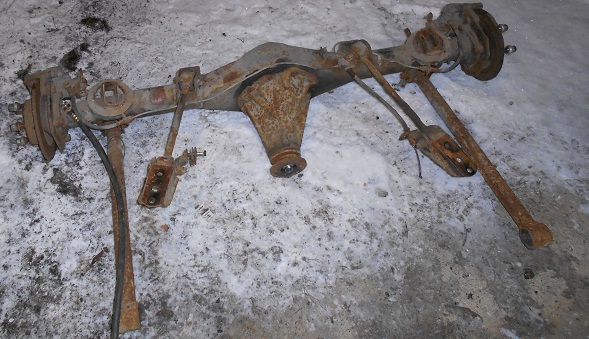
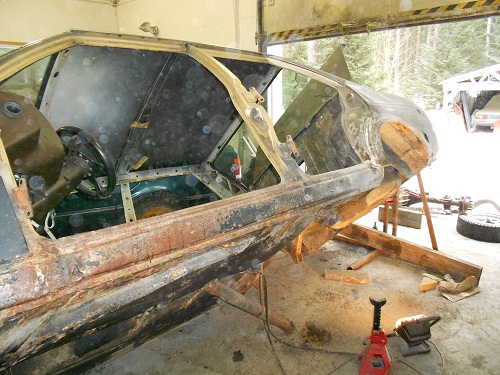
After that, the chassis was hung on a homemade chassis repair bench, where it was able to be rotated. This makes all underbody repair work very easy, even enjoyable.
Chassis repair
All the rotten steel was removed, leaving no rusty panels in place. The new panels were fabricated from electrically zinc coated steel, that is still easy to weld and possible to paint. The replacing panels were cut to measures as accurately as possible, in order to prevent any overlapping, that would leave nasty places for rust to develop. Using cardboard (out of empty beer boxes) or thick paper to generate shape helps for this.
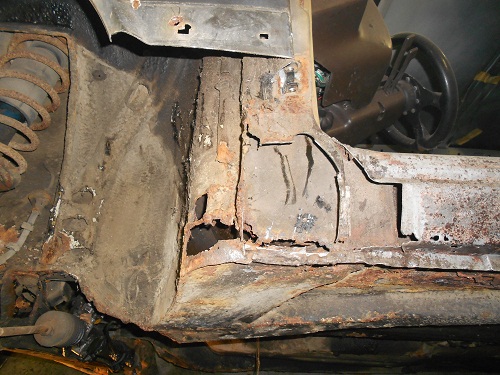
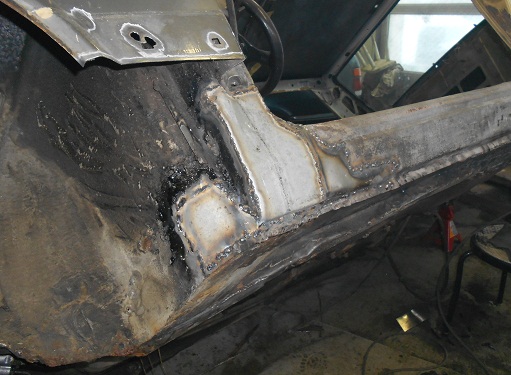
One of the most difficult places was the front end of the sill. It had many holes in it allowing road debris to enter boxes and other critical structures of the body. In order to repair this, all the panels and layers of the structure needed to come off, one by one. After all repair and surface treatment, it still needs to be ensured that there is no place for sand, salty water and other debris to accumulate.
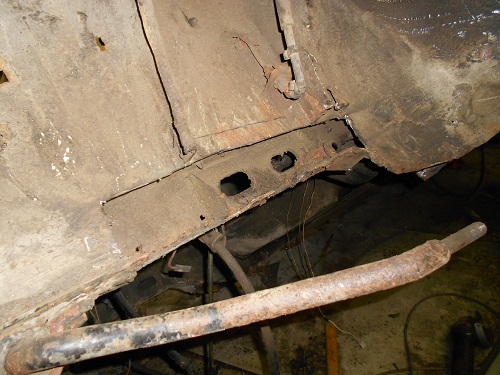
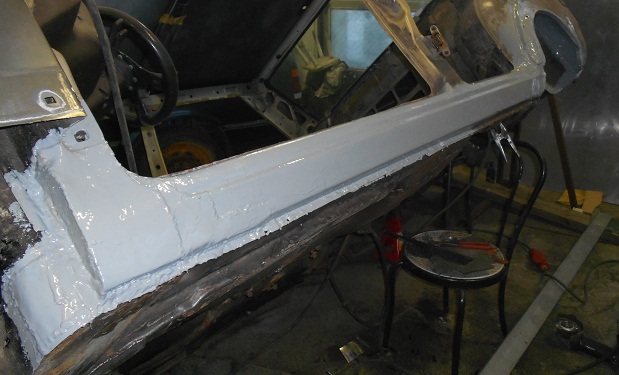
The surface treatment of repaired parts was started with zinc-based paint (Zinc 182 or 2-component industrial stuff) following by an alcyd paint (good old brand Miranol here in Finland). Although the latter one takes very long time to get dry, I have noticed that the surface made like this is very resistant to rust. I have learnt my lessons - I never use any spray paints to the parts that are subjected to the risk of corrosion. They WILL rust. When coated with any product intended for underbody protection, you will find the rust under it - if the paint used is not proper one.
When the left side of the car was ready the chassis was turned over and the job continued with the right side. The sill was in very bad condition there but on the other hand, there was not so many difficult-to-do places.
The rusty battery stand had to leave, the battery will be re-located to somewhere else. Tail lights were removed in order to carry out the necessary repair to the rear end of the car. Pictures of this are shown below.
Again, cardboard was used to model the necessary replacement panels. In the pictures below, the panels are in their places but not yet welded in.
Sill (or what was left of it) was opened and all sand and other debris inside them was removed. A rubber hose attached to a normal vacuum cleaner works well here! I use the same method for sand-blasted car bodies. Quite much material was removed before I found anything in reasonable condition. Another picture represents the surface with phosphoric acid added for rust removal.
A new sill and related box structure was fabricated from zinc-coated steel.
Prior painting, the sill is shown in the picture below.
Several places needing for repair were found under the front fender. This was the case with the front end of the sill, too.
Repair of the under-car box structure.
The bottom part of the chassis is starting to be ready for painting. Finally, there will be something other to do than cutting and welding. This will be shown on the next page...
Page 2